


Sometimes we need some user interaction in our batch files.
We may need to know to which directory a file is to be copied, for example.
Or which drive needs to be formatted.
There are many ways to achieve this user interaction.
The most basic form of user interaction, of course, is the PAUSE command, which halts the batch file until the user presses "any key" (apart from Ctrl, Alt, Shift, CapsLock, NumLock or ScrollLock).
Maybe not really sophisticated, but it works and is always available, in all DOS, Windows and OS/2 versions.
How you can manage to retrieve user input depends on the OS version used, and whether you want to allow "third party" tools or use "native code" only.
As of Windows 2000, user input can be obtained quite easily by using SET /P
SET /P variable=[promptString]
This command will display an optional promptString where the user can type in a string and press Enter. The typed string will then be stored in the specified environment variable variable.
| Warning: | Working with a stored string containing ampersands and doublequotes may cause your batch file to fail or even to execute "unexpected" code (code insertion). Do not use SET /P in batch files running with elevated privileges! |
In NT we don't need temporary files and we can skip a few lines by using TYPE CON and FOR /F:
@ECHO OFF
:: UserInNT.bat:: How to use the TYPE CON command to receive user input:: Written by Rob van der Woude:: http://www.robvanderwoude.comECHO.
ECHO Demonstration of receiving user input through the TYPE CON command.
ECHO Type in any string and close by pressing Enter, F6 (or Ctrl+Z), Enter.
ECHO Only the last non-empty line will be remembered, leading spaces are ignored.
ECHO.
:: Only one single command line is needed to receive user inputFOR /F "tokens=*" %%A IN ('TYPE CON') DO SET INPUT=%%A
:: Use quotes if you want to display redirection characters as wellECHO You typed: "%INPUT%"
It is still just as un-intuitive as the first COPY CON example, though.
| Update: | Replace TYPE CON by MORE in the above NT batch file and you can save yourself pressing Enter once — you'll need to press F6, Enter only instead of Enter, F6, Enter, though the latter will still work.[Tip posted by "Frank" on alt.msdos.batch.nt] |
Tom Lavedas' New and Improved Data Input Routine! shows a way to use a graphical box to ask for user input in Windows 95
Duke Communications International, Inc.'s tip #0323: How can I get a batch file to prompt me for parameters? shows a way to get a graphical box asking for user input in Windows NT
My own DialogBoxes (executables, written in C#) can be used to display messages and ask for input in Windows XP and later versions.
Walter Zackery posted two interesting solutions to obtain user input in NT, on the alt.msdos.batch.nt news group.
One solution uses the FORMAT command, which will fail since it tries to format a diskette in drive A: at 160KB.
If you have a 5¼" drive as your A: drive don't use this one.
The second solution uses the LABEL command.
It will actually change drive C:'s volume label and then restore it again to its old value.
The volume label in NT is restricted to 32 characters, and so is the input string when using this LABEL trick for user input.
Besides that the batch file limits the string to 2 words (1 space) only.
I adapted the original postings so that the batch files no longer need to use temporary files. You can view the original postings at my Solutions found at alt.msdos.batch page.
Using FORMAT:
@ECHO OFF
:: Obtaining user input in Windows NT:: with the use of the FORMAT command:: posted August 20,1999:: Author: Walter Zackery:: Adapted by Rob van der Woude:: (no longer uses temporary file):: http://www.robvanderwoude.comSET INPUT=
CLS
ECHO\
ECHO Enter your input string and press ENTER when done.
ECHO\
FOR /F "tokens=5* delims= " %%A IN ('FORMAT /F:160 A: ^| FIND "..."') DO SET INPUT=%%B
SET INPUT
Using LABEL:
@ECHO OFF
:: Obtaining user input in Windows NT:: with the use of the LABEL command:: posted August 20,1999:: Author: Walter Zackery:::: Adapted by Rob van der Woude:: (no longer uses a temporary file;:: redirection of label command's:: standard error prevents label command's:: own prompt to be displayed on screen)CLS
ECHO.
FOR /F "tokens=5* delims= " %%A IN ('VOL C: ^| FIND "drive C"') DO SET OLDLABEL=%%B
ECHO Enter some input string, containing no more than 32 characters:
FOR /F "TOKENS=*" %%? IN ('LABEL C: 2^>NUL') DO SET INPUT=%%?
SET INPUT
LABEL C: %OLDLABEL%
Clay Calvert posted another interesting solution to obtain Yes or No input in most DOS versions by using DEL's /P switch (prompt for confirmation).
Another great solution by Eric Phelps uses a temporary HTA file to obscure a password while it is being typed.
In the MS-DOS 3 days, a simple Yes/No question could be answered by changing to a temporary directory where two temporary batch files were located, Y.BAT and N.BAT.
Guess what happened if a user typed a completely different answer . . .
Since MS-DOS 6 we have CHOICE.COM (CHOICE.EXE in later versions), a much more versatile and reliable way to solve one character answers like Yes/No.
The CHOICE command was discontinued in Windows NT 4, only to be reintroduced again in Windows 7 (and maybe Vista?).
If you work with one of these "challenged" Windows versions, you may want to try my Poor Man's Choice instead, or use DEBUG to create REPLY.COM (16-bit, won't work in a 64-bit OS), as published in Microsoft Knowledge Base article Q77457: Accepting Keyboard Input in Batch Files.
There is another way to receive user input: COPY CON
The command:
COPY CON filename
copies the user input on the command line to the file filename.
To stop entering user input, the user has to type Ctrl+Z (or F6), followed by the Enter key.
Many PC users and batch file authors (including myself), find this approach "less intuitive", to say the least. One would expect that pressing the enter key is enough, and once you find out it isn't, the previous line of input cannot be removed anymore.
The following trick uses ANSI to perform some key translation: the Enter key is translated to the F6 key followed by the Enter key. Thus only one line of input can be entered, and pressing the Enter key sends the input to the temporary file USERINP.TMP.
| Note: | The ← character is the Esc character, or ASCII character 27 (or 1B Hexadecimal).It is a representation of the Esc key. This Esc character is not to be confused with escape characters! How to create the Esc character depends on the editor you use: • In EDIT, use Ctrl+P followed by Alt+27 (press Alt, keep it pressed, and then type 27 on the numeric key pad).• In Notepad or Wordpad, copy and paste the Escape character from some reference file you can create using EDIT. • In Norton Commander or File Commander's editor, use Ctrl+Q followed by Alt+27 on the numeric key pad.• In E and EPM (OS/2) just type Alt+27 on the numeric key pad.• In UltraEdit, press Ctrl+I followed by the Esc key.You may have to change the codepage to 437 in some editors. |
The previous example is only a bare minimum. The following example not only asks for user input, but stores it in an environment variable USRINPUT as well:
@ECHO OFF
REM * Ask for USeR INPUT and store it in variable USRINPUTREM * Assumes ANSI.SYS is loadedREM * Written by Rob van der WoudeSET USRINPUT=
REM * Turn on ANSI key translation (translate EnterREM * key to F6+Enter sequence) and ask for input:ECHO ←[13;0;64;13pEnter one word only . . .
REM * Copy entered text to temporary file:COPY CON %TEMP%.\~USRINP.TMP
REM * Turn off ANSI key translation and clear irrelevant screen output:ECHO ←[13;13p←[3A←[K←[1B←[K←[1B←[K←[2A
REM * Add empty line to temporary file. The empty lineREM * will be used to stop DATE asking for new date.ECHO.>> %TEMP%.\~USRINP.TMP
ECHO.>> %TEMP%.\~USRINP.TMP
REM * Create a temporary batch file that will store theREM * entered text into the environment variable USRINPUT:TYPE %TEMP%.\~USRINP.TMP | DATE | FIND "):" > %TEMP%.\~USRINP.BAT
REM * Create more temporary batch files. AddREM * more command line parameters if necessary,REM * as in: ECHO SET USRINPUT=%%3 %%4 %%5 %%6 %%7 %%8 %%9>CURRENT.BATECHO SET USRINPUT=%%3>CURRENT.BAT
REM * VOER.BAT and TYP.BAT are replacements for CURRENT.BAT for DutchREM * DOS versions; add your own language versions if necessary:ECHO SET USRINPUT=%%6>VOER.BAT
ECHO SET USRINPUT=%%4>TYP.BAT
REM * This temporary batch file now sets the variable USRINPUT:CALL %TEMP%.\~USRINP.BAT
REM * Display the result:ECHO You typed: ←[1m%USRINPUT%←[0m
ECHO.
PAUSE
REM * Finally, clean up the mess of temporary files:FOR %%A IN (%TEMP%.\~USRINP.BAT %TEMP%.\~USRINP.TMP VOER.BAT TYP.BAT CURRENT.BAT) DO DEL %%A
The previous batch file should work in every DOS version, assuming ANSI.SYS (or one of its replacements, like ANSI.COM) is loaded.
With a few minor adjustments (replace .BAT with .CMD everywhere) it can be used in OS/2 as well.
Use READLINE instead, however, in OS/2's DOS sessions.
The following batch file checks if ANSI.SYS is loaded.
If so, it will tell the user to press the Enter key only.
If not, it will tell the user to press F6 first, followed by the Enter key.
However, to check if ANSI.SYS is loaded, this batch file needs MS-DOS 6 or later.
@ECHO OFF
REM * Asks for USeR INPut and store it in variable USRINPUTREM * Uses ANSI if available, but works without ANSI tooREM * Assumes MS-DOS 6 or laterREM * Written by Rob van der WoudeSET USRINPUT=
REM * Check if ANSI sequences can be used (needs atREM * least MS-DOS 6 to get an errorlevel from FIND):SET ANSI=1
MEM /C | FIND "ANSI" > NUL
IF ERRORLEVEL 1 SET ANSI=0
REM * Turn on ANSI key translation (translate EnterREM * key to F6 + Enter sequence) if possible:IF "%ANSI%"=="1" ECHO ←[13;0;64;13p
REM * Ask for input:IF "%ANSI%"=="0" ECHO Enter one word only, and press F6 followed by Enter . . .
IF "%ANSI%"=="1" ECHO Enter one word only, and press Enter . . .
REM * Copy entered text to temporary file:COPY CON %TEMP%.\~USRINP.TMP
REM * Turn off ANSI key translation and clear irrelevant screen output:IF "%ANSI%"=="0" CLS
IF "%ANSI%"=="1" ECHO ←[13;13p←[3A←[K←[1B←[K←[1B←[K←[2A
REM * Add empty line to temporary file. The empty lineREM * will be used to stop DATE asking for new date.ECHO.>> %TEMP%.\~USRINP.TMP
ECHO.>> %TEMP%.\~USRINP.TMP
REM * Create a temporary batch file that will store theREM * entered text into the environment variable USRINPUT:TYPE %TEMP%.\~USRINP.TMP | DATE | FIND "):" > %TEMP%.\~USRINP.BAT
REM * Create more temporary batch files. AddREM * more command line parameters if necessary,REM * as in: ECHO SET USRINPUT=%%3 %%4 %%5 %%6 %%7 %%8 %%9>CURRENT.BATECHO SET USRINPUT=%%3>CURRENT.BAT
REM * VOER.BAT and TYP.BAT are replacements for CURRENT.BAT for DutchREM * DOS versions; add your own language versions if necessary:ECHO SET USRINPUT=%%6>VOER.BAT
ECHO SET USRINPUT=%%4>TYP.BAT
REM * This temporary batch file now sets the variable USRINPUT:CALL %TEMP%.\~USRINP.BAT
REM * Display the result:IF "%ANSI%"=="0" ECHO You typed: %USRINPUT%
IF "%ANSI%"=="1" ECHO You typed: ←[1m%USRINPUT%←[0m
ECHO.
PAUSE
REM * Finally, clean up the mess of temporary files:FOR %%A IN (%TEMP%.\~USRINP.BAT %TEMP%.\~USRINP.TMP VOER.BAT TYP.BAT CURRENT.BAT) DO DEL %%A
SET ANSI=
There are many batch utilities on the web that help ask for user input.
I will list some of them here:

A non-batch solution for Windows 95/98/NT/2000 users is the GetS( ) function in KiXtart:
@ECHO OFF
:: UsrInKix.bat, Version 1.00 for Win32:: Batch file using Kix to retreive user input:: Written by Rob van der Woude:: http://www.robvanderwoude.com:: Create a temporary Kix script that will:: in turn create a temporary batch file:> %TEMP%.\UserIn.kix ECHO REDIRECTOUTPUT( "NUL" )
>>%TEMP%.\UserIn.kix ECHO GETS $UserIn
>>%TEMP%.\UserIn.kix ECHO IF OPEN( 1, "@SCRIPTDIR\UserIn.bat", 5 ) = 0
>>%TEMP%.\UserIn.kix ECHO WRITELINE( 1, "SET UserIn=" + $UserIn )
>>%TEMP%.\UserIn.kix ECHO ELSE
>>%TEMP%.\UserIn.kix ECHO ? "Error opening temporary file, errorcode = " + @ERROR
>>%TEMP%.\UserIn.kix ECHO ENDIF
:: Prompt for user input:ECHO Type anything you like and press Enter when finished:
:: Retreive user input using the Kix script, and:: then store the result in a temporary batch file:KIX32.EXE %TEMP%.\UserIn.kix
:: Call the temporary batch file to store:: the result in an environment variable:CALL %TEMP%.\UserIn.bat
:: Clean up the temporary files:IF EXIST %TEMP%.\UserIn.* DEL %TEMP%.\UserIn.*
:: Finaly, display the result:ECHO You typed: %UserIn%
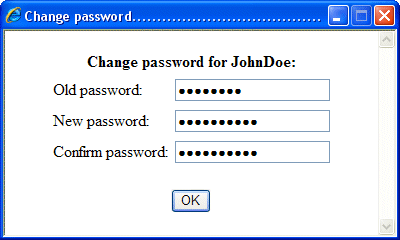
OS/2 users may want to take a look at UserInPM, a utility written in VX-Rexx, displaying a small PM window asking for user input.
It creates a temporary batch file to set an environment variable to the typed input.
An example batch file, with the resulting PM window:
 |
You will need the VX-Rexx runtime library VROBJ.DLL to run UserInPM.
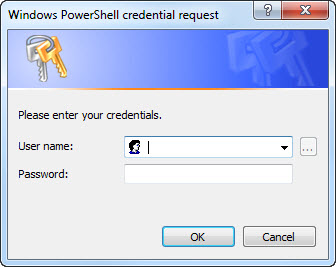
For a login dialog, you can also use the following PowerShell code:
# Dialog asking for credentials$cred = Get-Credential $username
# Return username and password, delimited by a semicolonWrite-Host $cred.GetNetworkCredential( ).UserName -NoNewline
Write-Host ";" -NoNewline
Write-Host $cred.GetNetworkCredential( ).Password
Save it as login.ps1, and use it to return the user name and password to a batch file:
Without a script, a so called "one-liner":
My LoginDialog.ps1 is based on the code above, with some error handling added:
param(
[string]$UserName = $null,
[switch]$TabDelimited,
[switch]$h,
[parameter( ValueFromRemainingArguments = $true )]
[object]$invalidArgs
)if ( $h -or $invalidArgs ) {
Write-HostWrite-Host "LoginDialog.ps1, Version 1.01"
Write-Host "Present a login dialog, and return the user name and password"
Write-HostWrite-Host "Usage: " -NoNewline
Write-Host "./LoginDialog.ps1 [ username ] [ -TabDelimited ]" -ForegroundColor White
Write-HostWrite-Host "Where: " -NoNewline
Write-Host "username " -ForegroundColor White -NoNewline
Write-Host "is the optional user name presented in the dialog"
Write-Host " -TabDelimited " -ForegroundColor White -NoNewline
Write-Host "tab delimited output (default delimiter: semicolon)"
Write-HostWrite-Host "Written by Rob van der Woude"
Write-Host "http://www.robvanderwoude.com"
Exit 1} else {
Try
{ # Dialog asking for credentials$cred = Get-Credential $UserName
# Return username and password, delimited by a semicolon (default) or tab (switch -TabDelimited)Write-Host $cred.GetNetworkCredential( ).UserName -NoNewline
if ( $TabDelimited ) {
Write-Host "`t" -NoNewline
} else {
Write-Host ";" -NoNewline
}Write-Host $cred.GetNetworkCredential( ).Password
}Catch
{Write-Host "-- Canceled --"
Exit 1 }}With LoginDialog.ps1, catching a login error in the batch file is easy:
My GetHDDStatusGUI.ps1 combines several GUI techniques:
<#.SYNOPSISDisplay the SMART status for all local harddisks in a popup window and in Windows' Notification Area (a.k.a. System Tray).DESCRIPTIONThis script uses WMI to query the status of all local physical harddisk drives, and displays the results in a popup window and in Windows' Notification Area (a.k.a. System Tray).In the status display, each physical harddisk is associated with the drive letter of one of its volumes.Since Windows 10 limits the number of lines in desktop notifications, any errors will be placed at the top of the displayed status list, otherwise the list is sorted by drive letter.If all disks report OK, the script returns True and return code ("ErrorLevel") 0, otherwise False and return code 1.Since this script uses WMI and drive letters, it will not work in Linux..PARAMETER ModalMake the popup window always stay on top.PARAMETER HideHide the console window when the script is started, restore it (but minimized) afterwards.PARAMETER VersionShow this script's version number; if combined with -Verbose show full script path, version number and last modified or release date.PARAMETER DebugDisplay intermediate results for each disk drive in console; if combined with -Verbose show intermediate results for each associated volume too.PARAMETER HelpShow this script's help screen.OUTPUTSTrue and return code 0 if all disks report OK, otherwise False and return code 1.EXAMPLE. ./GetHDDStatusGUI.ps1Will display a popup window with the drive letters in use and the SMART status of the associated physical harddisk drive..EXAMPLE. ./GetHDDStatusGUI.ps1 -Debug -VerboseWill list details for all physical harddisk drives and volumes in the console, and display a popup window with the drive letters in use and the SMART status of the associated physical harddisk drive..EXAMPLE. ./GetHDDStatusGUI.ps1 -Version -VerboseWill display this script's full path, version number and last modified or release date..LINKScript written by Rob van der Woude:https://www.robvanderwoude.com/ .LINKDisk check based on code by Geoff:http://www.uvm.edu/~gcd/2013/01/which-disk-is-that-volume-on.LINKSystem Tray ToolTip Balloon code by Don Jones:http://blog.sapien.com/current/2007/4/27/creating-a-balloon-tip-notification-in-powershell.html.LINKExtract icons from Shell32.dll by Thomas Levesque:http://stackoverflow.com/questions/6873026.LINKHide and restore console by Anthony:http://stackoverflow.com/a/15079092.LINKCapture common parameters by mklement0:https://stackoverflow.com/a/48643616#>param (
[parameter( ValueFromRemainingArguments = $true )]
[string[]]$Args, # Leave all argument validation to the script, not to PowerShell
[switch]$Modal,
[switch]$Hide,
[switch]$Version,
[switch]$Help
)$progver = "1.04"
[bool]$Debug = ( $PSBoundParameters.ContainsKey( 'Debug' ) )
[bool]$Verbose = ( $PSBoundParameters.ContainsKey( 'Verbose' ) )
# Show help if any unnamed argument is given$Help = $Help -or ( $Args.Length -gt 0 )
# Show help if running in Linux$Help = $Help -or ( $HOME[0] -eq '/' )
# Help disables Hide parameter$Hide = $Hide -and -not $Help
# Debug disables Hide parameter$Hide = $Hide -and -not $Debug
if ( $Help ) {
Get-Help "$PSCommandPath" -Full
exit 1}if ( $Version ) {
if ( $Verbose ) {
$lastmod = ( [System.IO.File]::GetLastWriteTime( $PSCommandPath ) )
if ( $lastmod.ToString( "h.mm" ) -eq $progver ) {
"`"{0}`", Version {1}, release date {2}" -f $PSCommandPath, $progver, $lastmod.ToString( "yyyy-MM-dd" )
} else {
# if last modified time is not equal to program version, the script has been tampered with"`"{0}`", Version {1}, last modified date {2}" -f $PSCommandPath, $progver, $lastmod.ToString( "yyyy-MM-dd" )
}} else {
$progver } exit 0}######################################## Hide console window ## by Anthony on StackOverflow.com ## http://stackoverflow.com/a/15079092 ########################################$signature1 = @'
public static void ShowConsoleWindow( int state ){ var handle = GetConsoleWindow( ); ShowWindow( handle, state );}[System.Runtime.InteropServices.DllImport( "kernel32.dll" )]static extern IntPtr GetConsoleWindow( );[System.Runtime.InteropServices.DllImport( "user32.dll" )]static extern bool ShowWindow( IntPtr hWnd, int nCmdShow );'@
$hideconsole = Add-Type -MemberDefinition $signature1 -Name Hide -Namespace HideConsole -ReferencedAssemblies System.Runtime.InteropServices -PassThru
# Hide consoleif ( $Hide ) {
$hideconsole::ShowConsoleWindow( 0 )
}################### Disk inventory ###################[System.Collections.SortedList]$volumedetails = New-Object System.Collections.SortedList
[System.Collections.SortedList]$volumestatus = New-Object System.Collections.SortedList
if ( $Debug ) {
Write-Host "Disk#`tStatus`tSize (GB)`tModel"
Write-Host "=====`t======`t=========`t====="
}$diskdrives = Get-WmiObject -Namespace "root/CIMV2" -Class Win32_DiskDrive
$warnings = $false
foreach ( $disk in $diskdrives ) {
$diskindex = $disk.Index
$diskmodel = $disk.Model -replace "Disk Device","Disk"
$disksize = "{0,5:F0} GB" -f ( $disk.Size / 1GB )
$diskstatus = $disk.Status
if ( $Debug ) {
if ( $Verbose ) {
Write-Host }Write-Host ( "{0}`t{1}`t{2}`t{3}" -f $diskindex, $diskstatus, $disksize, $diskmodel )
}$part_query = 'ASSOCIATORS OF {Win32_DiskDrive.DeviceID="' + $disk.DeviceID.replace('\','\\') + '"} WHERE AssocClass=Win32_DiskDriveToDiskPartition'
$partitions = @( Get-WmiObject -Query $part_query | Sort-Object StartingOffset )
foreach ( $partition in $partitions ) {
$vol_query = 'ASSOCIATORS OF {Win32_DiskPartition.DeviceID="' + $partition.DeviceID + '"} WHERE AssocClass=Win32_LogicalDiskToPartition'
$volumes = @( Get-WmiObject -Query $vol_query )
foreach ( $volume in $volumes ) {
# 0 = Unknown; 1 = No Root Directory; 2 = Removable Disk; 3 = Local Disk; 4 = Network Drive; 5 = Compact Disc; 6 = RAM Disk # DriveType 3 means harddisks onlyif ( $volume.DriveType -eq 3 ) {
if ( $Debug -and $Verbose ) {
Write-Host ( "{0}`t{1,2}`t{2}`t{3}" -f $diskindex, $volume.Name, $disksize, $diskmodel )
}if ( -not $volumedetails.Contains( $volume.Name ) ) {
$volumedetails.Add( $volume.Name, "[Disk {0,2}] {1} {2}" -f ( $diskindex, $disksize, $diskmodel ) )
$volumestatus.Add( $volume.Name, $diskstatus )
} } } }}################## Dialog window ##################Add-Type -AssemblyName System.Windows.Forms
[System.Windows.Forms.Application]::EnableVisualStyles( )
$form = New-Object System.Windows.Forms.Form
$form.Width = 640
$form.Height = 25 * $volumedetails.Count + 120
$form.Font = 'Courier New, 10'
$form.BackColor = 'White'
$form.MaximizeBox = $false;
$form.FormBorderStyle = 'FixedSingle'
$form.TopMost = $Modal
$y = 0
$even = $false
$volumedetails.Keys | ForEach-Object {
$label = New-Object System.Windows.Forms.Label
$label.Size = '35, 20'
$label.Location = New-Object System.Drawing.Point( 10, ( 15 + $y ) )
$label.Text = "$_"
if ( $even ) { $label.BackColor = 'ButtonFace' }
$form.Controls.Add( $label )
$status = ( $volumestatus[$_] )
$label = New-Object System.Windows.Forms.Label
$label.Size = '40, 20 '
$label.Location = New-Object System.Drawing.Point( 45, ( 15 + $y ) )
$label.Text = $status
if ( $status -eq "OK" ) {
$label.ForeColor = 'Green'
} else {
$label.ForeColor = 'Red'
$warnings = $true
}if ( $even ) { $label.BackColor = 'ButtonFace' }
$form.Controls.Add( $label )
$label = New-Object System.Windows.Forms.Label
$label.Size = '490, 20'
$label.Location = New-Object System.Drawing.Point( 85, ( 15 + $y ) )
$label.Text = $volumedetails[$_]
if ( $even ) { $label.BackColor = 'ButtonFace' }
$form.Controls.Add( $label )
$y = $y + 25
$even = -not $even
}if ( $warnings ) {
$form.Text = "HDD Status Warning"
} else {
$form.Text = "HDD Status OK"
}$buttonOK = New-Object System.Windows.Forms.Button
$buttonOK.BackColor = 'ButtonFace'
$buttonOK.Text = "OK"
$buttonOK.Size = '60,24'
$buttonOK.Location = New-Object System.Drawing.Point( 85, ( 30 + $y ) )
$form.Controls.Add( $buttonOK )
$form.AcceptButton = $buttonOK # Pressing Enter closes the dialog
$form.CancelButton = $buttonOK # Pressing Escape closes the dialog
######################################### System tray balloon tip notification #########################################[System.Windows.Forms.ToolTipIcon]$icon = [System.Windows.Forms.ToolTipIcon]::Info
$title = "HDD Status OK"
$systraymessage = ""
$volumedetails.Keys | ForEach-Object {
$status = ( $volumestatus[$_] )
if ( $status -eq "OK" ) {
$systraymessage = $systraymessage + "$_`t$status`n" # list in alphabetical sort order
} else {
$systraymessage = "$_`t$status`n$systraymessage" # errors at top of list
$icon = [System.Windows.Forms.ToolTipIcon]::Error
$title = "Warning: HDD Errors"
}}################################################################# Extract system tray icon from Shell32.dll ## C# code to extract icons from Shell32.dll by Thomas Levesque ## http://stackoverflow.com/questions/6873026 #################################################################$signature2 = @'
[DllImport( "Shell32.dll", EntryPoint = "ExtractIconExW", CharSet = CharSet.Unicode, ExactSpelling = true, CallingConvention = CallingConvention.StdCall )]private static extern int ExtractIconEx( string sFile, int iIndex, out IntPtr piLargeVersion, out IntPtr piSmallVersion, int amountIcons );public static Icon Extract( string file, int number, bool largeIcon ){ IntPtr large; IntPtr small; ExtractIconEx( file, number, out large, out small, 1 ); try { return Icon.FromHandle( largeIcon ? large : small ); } catch { return null; }}'@
$iconextractor = Add-Type -MemberDefinition $signature2 -Name IconExtract -Namespace IconExtractor -ReferencedAssemblies System.Windows.Forms,System.Drawing -UsingNamespace System.Windows.Forms,System.Drawing -PassThru
# System tray icon depends on statusif( $title -eq "HDD Status OK" ) {
$systrayicon = $iconextractor::Extract( "C:\Windows\System32\shell32.dll", 223, $true )
} else {
$systrayicon = $iconextractor::Extract( "C:\Windows\System32\shell32.dll", 53, $true )
}# Show system tray icon and balloon tip$notify = New-Object System.windows.Forms.NotifyIcon
$notify.BalloonTipText = $systraymessage
$notify.BalloonTipTitle = $title
$notify.BalloonTipIcon = [System.Windows.Forms.ToolTipIcon]$icon
$notify.Icon = $systrayicon
$notify.Visible = $true
$notify.ShowBalloonTip( 30000 )
# Show dialog[void] $form.ShowDialog( )
########################################### Restore console minimized (2) ## Change to 1 to restore to normal state ###########################################if ( $Hide ) {
$hideconsole::ShowConsoleWindow( 2 )
}################################## Exit code 1 in case of errors ##################################if ( $warnings ) {
$false exit 1} else {
$true exit 0}


It is possible to write batch files using PowerShell without requiring a (temporary) PowerShell script.
This is where PowerShell's -Command switch comes in handy.
However, don't expect it to make your code readable, and maintenance will be a real nightmare.
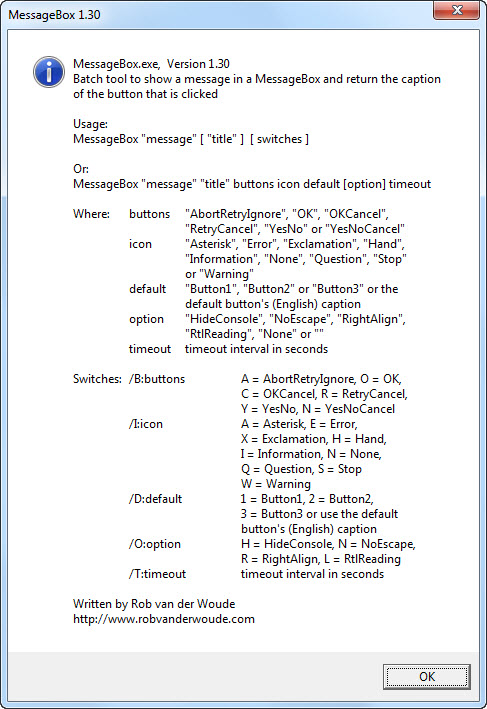
The messagebox below is a fairly simple example:

| Notes: | 1. | The code above is wrapped to allow a quick overview, but should be entered as a single line in a batch file. |
| 2. | Use single quotes for strings inside the PowerShell code, and backquotes for the batch file's FOR command. |
|
| 3. | Do not use backquotes for PowerShell literals! If you have to use PowerShell literals, enter them as [char] as shown in the following code:
( 'Are you sure you want to continue?{0}Really, really sure?' -f [char]0x0D ) instead of 'Are you sure you want to continue?`nReally, really sure?' |
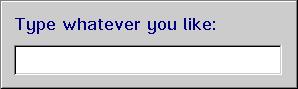
OK, even simpler, a plain popup message:

One more example, using the code of our previous PowerShell login dialog example:
| Notes: | 1. | The code above is wrapped to allow a quick overview, but should be entered as a single line in a batch file. |
| 2. | Credentials are stored in the environment variables Login.Name and Login.Passwd |
Advanced dialog boxes, output and input, including (masked) password prompts, can also be created using VBScript and Internet Explorer, but I would not recommend creating them on the fly.
See the VBScript Scripting Techniques section for some of these advanced user message windows.
| Note: | For peace of mind, I would recommend not using this technique at all: every now and then a Windows/IE update and/or too "tight" security settings will break the code, forcing you to rewrite it. My "educated guess" is that PowerShell code as shown above will last longer. |
| Update: | On June 15, 2022, Microsoft ended support for Internet Explorer, and announced that it would be removed in a future Windows Update. Do not use this technique any longer. |
page last modified: 2022-06-29; loaded in 0.0614 seconds


